

The rocks below my feet stole the show on my last visit to Maine coast. The wonderful golden light and rich shadows certainly helped.

The rocks below my feet stole the show on my last visit to Maine coast. The wonderful golden light and rich shadows certainly helped.

Yes, it is spring here in the Northern Hemisphere, and the Weekly Photo Challenge theme is indeed Green, but there are some of us who aren’t quite ready to let go of winter!

 The Sights.
The Sounds.
The Magic.
The Crowds.
Chaos in the Magic Kingdom(and other Disney Parks too!).


For this week the Weekly Photo Challenge theme is good old H2O. As a landscape photographer water is the prevailing theme in many of my photographs. When looking through my photos trying to decide which photos to include in this post it appears that roughly three quarters of my photos contain water in one form or another.
Here are a few wet examples, followed by a few tips for making your own watery photos.


1 ~ First and foremost, use a good quality circular polarizing filter, or CPL. If you only ever buy one filter make sure the CPL is it. It’s the one filter that cannot be duplicated digitally. They’re great for reducing or eliminating unwanted glare and reflections from wet rocks, leaves, and the surface of the water, thus allowing you to see through the surface of the water to what’s on the bottom.
2 ~ Don’t be afraid of a little rain. Most camera, whether they are listed as “weather sealed” or not are quite capable of withstanding a sprinkle or two. I always carry a small pack towel in my camera bag on the days I venture out when theres wain in the forecast.
Speaking of towels, dab don’t wipe the water off of your camera. Wiping could force the water into places that won’t make the camera happy.
3 ~ If it’s raining out use a lens hood to help keep raindrops from landing on the front element of your lens. Even when using a lens hood you should check the front element often and carry a clean microfiber lens cloth to wipe away any raindrops.
4 ~ When photographing water in its frozen form be sure to acclimate your camera slowly when you bring it inside after being out in the cold. The condensation that can form on, even worse in your camera again won’t make your camera very happy. I use two methods to deal with this. One is to put your camera in a large ziplock bag. Force as much air as possible out of the bag before sealing it. This way condensation will form on the outside of the bag, not your camera. The second is to simply put your camera in your camera bag and close it up, this is the method I use most. The padding on the camera bags act as insulation allowing the camera to slowly acclimate. Of course take your memory card out before hand so you do’t have to wait to upload your masterpieces.
Note: Tip #4 also applies to taking your camera from an air conditioned space out into hot humid weather.


Due to last years overwhelming demand I will be leading two Fall Foliage Workshops this year in the beautiful picturesque White Mountains of New Hampshire, home of some of the most spectacular scenery and “leaf peeping” to be found anywhere.
This year the workshops will be held the weekend of September 30th – October 2nd and again the following weekend, October 7th – 9th.
During each of these 2+ day workshops we will travel the White Mountains and north country of New Hampshire in search of the best fall color and scenic views. From waterfalls bordered by the reds, yellows, and golds of a New Hampshire autumn, to scenic mountain vistas overlooking remote mountain ponds, you’re sure to come away with many colorful autumn images.
Friday evening there is a short meet and greet and if time allows we’ll get out and get some photos! But not too late as we will have two very full days of photography ahead of us on Saturday and Sunday.
Saturday morning we will start out before sunrise in order to capture the best morning light. After each mornings shoot we will return to the White Mountain Hostel were we will have an image review and post processing session, going over the mornings photos. After the image review session there will be a couple of hour mid day break to relax, recharge, and get a bite to eat. Then we will meet at the prescribed time for the afternoon/evenings shoot.
After a good nights rest, we will do it all over again on Sunday.
Transportation throughout the White Mountain area for the duration of the workshop, where I will take you to some of the most popular, with good reason, White Mountain locations, as well as many off the beaten path “secret” places.
Tips, tricks, and techniques for capturing beautiful fall foliage images. Workshops are kept small with no more than 3 participants so I’m able to provide the best and most personal instruction possible.
Daily post-processing/image review session.
Transportation to the North Conway, NH area.
Meals and lodging. For lodging I highly recommend the White Mountain Hostel in Conway for its clean rooms(several of them private), friendly staff, and extremely budget friendly rates. For those not interested in the “Hostel experience,” there are numerous lodging options in the North Conway area. I do recommend booking your lodging early as rooms fill up quickly, especially during the second workshop weekend which falls on the Columbus Day holiday weekend.
The cost for these 2+ day workshops is $725.
For more information, cancellation policy, or to reserve your spot use the Contact Page.

Among the many water lilies covering the waters surface I knew this was the one. Since It was raining the morning I took this I knew I wanted to get close in order to capture not only the detail in the flower, but to accentuate the raindrops on each petal.
For this shot I had to wade out into the water almost waist deep, not an uncommon occurance, and set up my camera and tripod directly over and looking down on the flower.
Then came what may be the most difficult part of photographing water lilies up close and personal like this. And that is standing still, very still. Because even the slightest movement on my part would cause ripples on the waters surface which would then impart movement in the flower.
For this shot I use my Canon 5D MkIII with the Canon 70-200 F/2.8L IS II with a 25mm extension tube between the camera and lens, which allowed me to achieve a much closer focus than I otherwise would using just the camera and lens.
Camera Settings: F/16, 175mm, ISO 400 for 1/50 sec.
Click here to see more Weekly Photo Challenge: Details

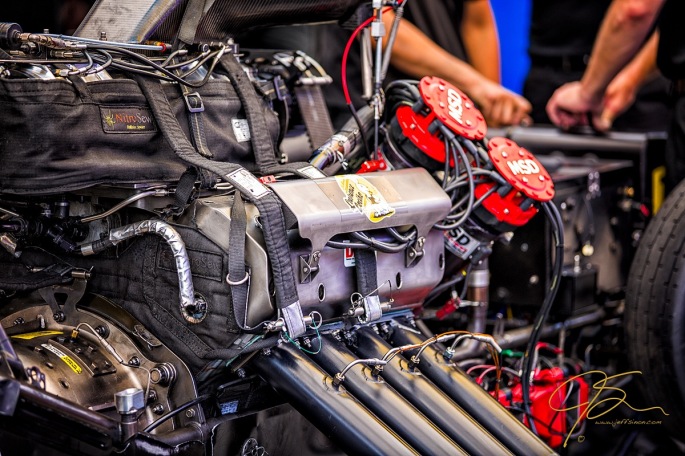
Thats the amount of horsepower put out by the engine in a top fuel car. During the course of each 1,000 foot, run a top fuel car consumes roughly 22 gallons of nitro-methane fuel.
Each run is less than 4 seconds long.
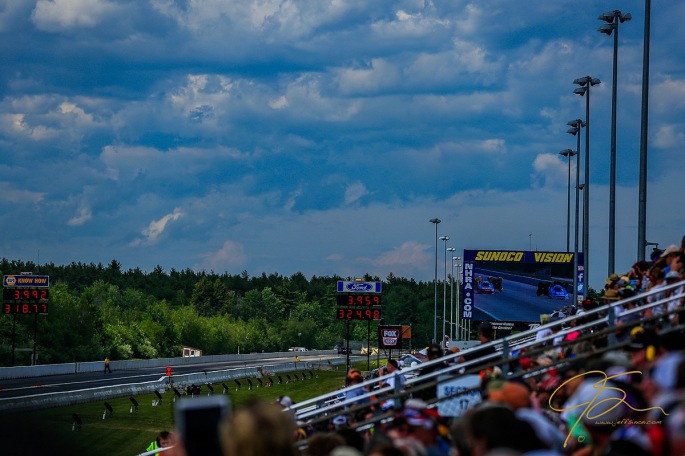
A top fuel car can go from zero to ever 330 MPH in as little as 3.7 seconds. Due to weather conditions, which can greatly affect the performance of these cars, those speed weren’t quite reached the day I was at the track. But they came close.
Top fuel cars come in two flavors.
Funny Cars,

and Dragsters.

Both cars use the same monstrous engines, but the dragsters are slightly quicker due to aerodynamics and engine placement. The dragsters, having the engine behind the driver places more weight on the rear wheel providing better traction for the launch.
While there are a large number of people on a top fuel cars pit crew, it’s up to the driver to win the race.

This is Brittany Force, she is one of those drivers.
Not who many of you would expect to see behind the wheel of one of these enormously powerful cars. You might be surprised just how many women drivers there are.
This is Brittany’s car.
(also seen leaving the starting line in the first photo)

The Weekly Photo Challenge topic is Landscape, so rather than simply share a few landscape photos I’m going to talk about the one filter that should be in every nature and landscape photographers camera bag.
The one filter that cannot be duplicated in the computer, and the one filter I never leave home without.

You can duplicate graduated neutral density filters all day long in Lightroom.
You can even simulate the effect of a straight neutral density filter simply by photographing in lower light, using smaller apertures, or lower ISO settings, thus allowing you to get longer exposure times.
However when it comes to removing the glare on shiny reflective surfaces like wet rocks and leaves, or the reflections on the surface of a flowing stream to reveal the stream bed below, there is only one way to do it. And that is with a good quality Circular Polarizer filter, or CPL for short.

A circular polarizer is a filter that attaches to the front of your lens, usually by screwing onto the front filter threads. (Now you know why those threads are there 😉 )
What does a CPL do?
Notice how in the first image the colors are much less saturated and the details below the waters surface are much less visible. The is cause by glare. Notice how in the second image, shot using the same exposure settings,* the colors are richer, more saturated, and there is more visible detail under the water.
While a CPL can also help increase contrast and saturation in a photo, both of these can be duplicated in the computer, glare and reflection removal can’t.
*Note: The second image is darker due to the ability of the Circular Polarizer to reduce the amount of light by as much as 2-stops. This is an added benefit when trying to use longer exposure times to capture flowing water with that silky smooth look.
The better the image you get straight out of the camera the better the final image will be after post processing. The following are the above two images, processed as identically as I could. While this is totally subjective on my part the second image, the one where the circular polarizer was used, is the better final image.


1 – Buy the best you can afford.
Cheap CPL filters can cause image softness as well as impart a color cast on your photo. I’ve used CPLs from B+W, Lee, and Singh Ray with excellent results. Be forewarned, good filters are not inexpensive, though in my opinion you get what you pay for. For more budget friendly CPL filters, check out Tiffen, or Hoya. I have no experience with the latter two, but I have read good things about their line of filters.
2 – Avoid using a CPL when photographing wide scenes.
One thing polarizers do very well is darken blue sky. Too well if you over adjust the filter. BUT, and it’s a big but, the effect of a CPL is greatest at 90° to the light source, for a landscape photographer this is likely the sun. The effect is reduced more and more as the angle to the sun changes. This is a big problem when photographing wide scenic landscapes with a lot of sky. The result will be part of the sky will be noticeably darker when gradually fading across the frame. This is a royal pain in the backside – by that I mean darn near impossible – to correct in the computer.
3 – Don’t for get to readjust when you recompose.
You can adjust the amount of polarization on the image by rotating the filter. As mentioned above the greatest effect is at 90° to the sun. So once you adjust the amount of polarization you want in an image and then move the camera for another composition, don’t forget to readjust the filter. I find it to be much easier to see the effect in live view rather than looking thru the viewfinder, but that could just be my aging eyes.
4 – You only need one.
Some of you may be thinking, “I have more than one lens that I use for landscape/waterfalls. Do I need a filter for each lens?” The answer is no.
Buy a filter that will fit the lens you own with the largest diameter filter threads. The buy inexpensive step-down rings to fit the filter to all of your other lenses.

To the soft sweet music of the forest the water shall dance.
